Joyeux Gourmet

Cooking, Recipes and Good Vibes

April Spring
Recettes et plus...
Site Logo
  • Mon Joyeux Gourmet
    Pas encore
    membre ?
    Connexion
    Inscription
  • Recipes
    • Publish my recipe
    • The Cook's Calendar
    • From appetizers to dessert
    • For any occasion
    • Seasonal cuisine
    • Regional Cuisine of France
    • World Cuisines
    • Diets and Nutrition
    • Difficulty level
  • Cookbooks
    • Publish my book critic
    • All books
  • Articles
    • Publish my Post
    • News, Tips, and Tutorials
    • Seasonal ingredients
    • Practical Guides
      • Cooking Temperatures
      • Kitchen Tools and Appliances
      • Cooking Glossary
      • Ingredient Guide
  • Practical Guides
    • Cooking Times
    • Cooking Temperatures
    • Kitchen Tools and Appliances
    • Cooking Glossary
    • Ingredient Guide
  • Welcome
  • Coupons and promotions
  • Login
    • Pas encore membre ? Mot de passe oublié ?
April Spring
  • Skip to primary navigation
  • Skip to main content
  • Skip to primary sidebar
  • Skip to footer
Home » Stériliser vos bocaux à l’eau bouillante

Sterilize your jars in boiling water

Updated on 20 November 2024 by
Picture of ratatouilleratatouille
Do you like this post ? Share it !
  • Share on Facebook
  • Share...
  • Pin It
  • Share by email

6 liked
Print

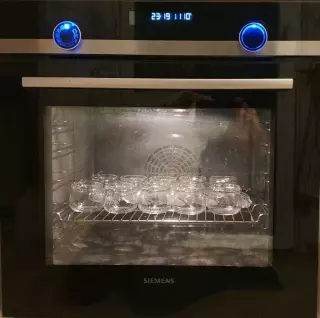
To enjoy your jams, jellies and other preserves for a long time, one essential step is to sterilize your containers. The method presented here is simple to implement, and allows you to sterilize your jars without any special sterilizer-type equipment. Please note that it is also possible to sterilize your jars using your oven .

Table des matières

Toggle
  • Before-filling
  •  
  • After-fill

Before-filling

Start by arranging your jam jars in the bottom of a casserole dish or large saucepan, with -depending on your type of jars- their seals or lids. Cover with water to completely immerse the jars. Then bring to the boil, and count 10 minutes from the first boils.

Meanwhile, cover your work surface with a clean tea towel. Using tongs, remove the sterilized jars and any lids or seals. Empty the jars and place them upside down on the cloth. Let them cool in the open air while you prepare your jams.

You can now fill your jars with your preparation, jam, jelly or other preserves while still hot, using a funnel, so as not to stain the rims of the jars, especially if you have jars with seals.


After-fill

Close your jars, either by screwing on the lid (be careful, it’s hot!), or by pressing the seal with the clamp.

If you’re using jars with seals, you’ll need to plunge them into the boiling water again once they’ve been filled and their clamps locked: plunge them back into the casserole, wedging them in with tea towels if necessary. Cover generously with water (up to 5 cm above the lids), then bring to the boil.

Account for at least 5 minutes of boiling water cooking time.

Finally, you can turn your jars upside down and let them cool in this position at room temperature.

Your cans are ready!

Reader Interactions

Leave a Reply Cancel reply

Your email address will not be published. Required fields are marked *

Primary Sidebar

About
ratatouille

My name is Pascal
My culinary biography :Passionné de cuisine et de bien manger, j'aime autant les plats traditionnels que la gastronomie contemporaine. Que ce soit pour les repas de tous les jours ou les grandes occasions, je préfère largement cuisiner par moi-même et (souvent) apprendre de mes erreurs plutôt que de céder à la tentation du "tout prêt" !
My favorite dish : Le couscous de maman
My favorite dessert : La tarte chocolat-banane
My favorite cuisines :
  • Image de FranceFrance
  • Image de ItalyItaly
  • Image de ThailandThailand
My cooking Playlist
  • Ma playlist sur Spotify
    spotify
  • Ma playlist sur Deezer
    deezer
  • Ma playlist sur Youtube Music
    youtube
  • Ma playlist sur Qobuz
    qobuz
Les gourmets que je suis
  • Image de doubichou
  • Image de
  • Image de lepetitfred
  • Image de falbala
  • Image de matt
  • Image de
  • Image de
  • Image de
  • Image de
  • Image de charlie
Log in to learn more.

A few seasonal items…

It’s peak harvest or production season for these ingredients… so take this opportunity to discover all the recipes that showcase them!

  • Image de white asparagus
    white asparagus
  • Image de white onion
    white onion
  • Image de Williams pear
    Williams pear
  • Image de Shiitake mushroom
    Shiitake mushroom
  • Image de cabbage
    cabbage
  • Image de new potato
    new potato

All seasonal ingredients

You might also be interested in these articles...

  • Sterilize your jars in the oven

    Sterilize your jars in the oven

  • Heat the cooking oil: not too much, not too little!

    Heat the cooking oil: not too much, not too little!

  • What is the "Brunoise" cutting technique in cooking?

    What is the "Brunoise" cutting technique in cooking?

  • How to make the perfect agar-agar dishes?

    How to make the perfect agar-agar dishes?

More ideas

Footer

Useful Links

  • Contact us
  • Legal Notice
  • Privacy Policy
  • Partners

Install the JGourmet app

QR code d'installation de l'appli Joyeux Gourmet sur Android Google Play

Follow us on social media

  • Suivez Joyeux Gourmet sur Facebook
  • Suivez Joyeux Gourmet sur Pinterest
  • Suivez Joyeux Gourmet sur Instagram
  • Suivez Joyeux Gourmet sur YouTube

All rights reserved©  2015–2026 · Joyeux Gourmet · Log in

Before submitting your article for publication, please make sure it complies with the règles de modération des publications.
Articles that do not meet the requirements will not be published.

Votre carnet de recettes vous attend

Votre carnet de recettes vous attend !

❤️
Sauvegardez vos coups de cœur
🛒
Liste de courses automatique
🔔
Nouvelles recettes en exclusivité
G
N
L
+
gigi, nonocuisine et plus de 0 autres ont déjà rejoint Joyeux Gourmet !
Créer mon compte gratuit Inscription en 1 minute
Déjà membre ?
Se connecter
Je veux en savoir plus sur Joyeux Gourmet