
Homemade preserves, once essential for surviving the winter, are now a creative and sustainable way to extend the shelf life of food while preserving its flavor. Easy to make with a little practice and good organization, they allow you to enjoy seasonal fruits and vegetables all year round. This article will guide you step by step to make your own homemade preserves safely and enjoyably.
Why make your own preserves?
Making your own preserves offers many benefits:
- Quality of ingredients: You choose fresh, local produce, free from industrial additives and preservatives.
- Cost savings: Buying fruits and vegetables in season is often cheaper.
- Reduced waste: Turn your surplus produce into preserves rather than throwing it away.
- Creativity: Explore an endless variety of recipes, from classic tomato confit to spicy mango chutney.
- Sustainability: Glass jars are reusable, which reduces plastic waste.
The basics for successful homemade preserves
Choosing the right equipment
Before you begin, make sure you have the right equipment:
- Glass jars with airtight lids (such as Le Parfait or Mason jars).
- A canner or large pot for sterilization.
- A funnel to make filling the jars easier.
- Tongs for handling hot jars.
Sterilizing the jars
Sterilization is an essential step to ensure the safety of your preserves:
- Wash your jars in hot soapy water and rinse them thoroughly.
- Place them in a pot filled with boiling water for 10 minutes.
- Drain them on a clean dish towel without wiping them, to prevent contamination.
- Also sterilize the lids or rubber seals.
Choosing ingredients
Use only fresh, ripe, and undamaged produce. Seasonal fruits and vegetables are ideal. For recipes containing meat or fish, be particularly careful in selecting and preparing the ingredients.
Preservation techniques
Hot-filling (appertization)
This method involves cooking the food (or pouring it hot into the jars) and then sterilizing it. It is ideal for vegetables, sauces, soups, and prepared dishes.
- Fill the jars, leaving 1 to 2 cm of space under the lid.
- Remove air bubbles with a spatula.
- Seal the jars tightly.
- Place them in a large pot or canner, cover with water, and bring to a boil for the time specified in the recipe (usually between 30 and 90 minutes).
Preserving by Acidification
Some preparations, such as pickles or tomato sauces, require high acidity (pH below 4.6) to prevent bacterial growth. Adding vinegar or lemon juice is often essential.
Jams and jellies
Jams require a high sugar content (about 60%) to ensure they keep well. Once cooked, they are poured hot into sterilized jars and sealed immediately.
Tips for successful preserves
- Follow the recipes: Do not alter the proportions of sugar, vinegar, or water, as they affect the safety of the preserves.
- Check for airtightness: After sterilization, press down on the lid. If it doesn’t budge, your jar is properly sealed.
- Store in a cool, dark place: Jars generally keep for 6 to 12 months.
- Inspect before eating: If a jar shows signs of spoilage (bulging lid, strange odor, mold), do not eat its contents.
Some recipe ideas to try
- Vegetable pickles: Carrots, cauliflower, radishes, in a vinegar brine.
- Strawberry jam: A timeless classic to enjoy at breakfast.
- Apple compote: Perfect for desserts or as a side dish.
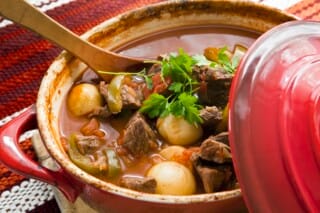
- Canned ratatouille: An explosion of summer flavors in the middle of winter.
- Mango chutney: A sweet-and-salty touch to accompany Indian dishes or grilled meats.
Give it a try!
Making your own preserves is a way to reconnect with a culinary tradition that’s as practical as it is rewarding. With a little preparation and the right techniques, you can enjoy the flavors of your favorite foods all year round, while saving money and reducing your environmental impact. So, grab your jars, get ready… sterilize!
Pour aller plus loin, venez découvrir toutes les recettes inspirées du thème "Conserves" !


Follow us on social media